Showing posts with label geoscript. Show all posts

Wednesday, November 30, 2016

Course slides: Geographic Scritping in gvSIG - halfway between user and developer


Last week I gave a one week course about geographic scripting with gvSIG at a Master course of the University of potsdam.


As usual I want to share the material to those interested in looking at the course contents from home.

Leaving out the first introduction parts that do not involve any code, here are the good parts of the course:

The 3rd part introduces gvSIG's composer and a bit the language used: python

PART 3: THE SCRIPTING COMPOSER AND PYTHON

The 4th part dives into building of geometries and reading and writing of shapefiles.

PART 4: GEOGRAPHIC SCRIPTING

The 5th part gives an insight about raster data handling for scientific purposes.

PART 5: RASTER DATA

Part 6 has a few extras, like doing some charting and writing libreoffice spreadsheets

PART 6: FROM GEO INTO YOUR REPORT

I hope you will enjoy this course, it is a very practical one and therefore packed with tons of working code snippets.

Obviously, if you want me to come to your university giving the course, just get in touch with me. :-)


Monday, October 6, 2014

Geopaparazzi at FOSS4G 2014 Osaka/Tokyo

This year I have the great honor to be invided to attend and present a the FOSS4G in Osaka and Tokyo and do some research with the team of professor Venkatesh Raghavan.

There will be to mainstreams we will contribute to:

Geopaparazzi

http://www.geopaparazzi.eu

This is quite natural, since the Japanese is one of the most supportive communities to the project.

Well, we do not know all the details about the program yet, but we know for sure that apart of the talks there will be a:

Hands-on workshop:  27 Oct 2014: FOSS4G-Osaka

Code Sprint: 25 Oct 2014: FOSS4G-Osaka

I have to admit that for me as author of Geopaparazzi it is amazing to attend the first geopaparazzi code sprint in Osaka. I do love code sprints!

I know for many of you it is far, but maybe some nearby community members can come? It would be great to meet you in person and maybe discuss some future geopaparazzi features.


uDig, the Spatial Toolbox and LESTO

http://udig.refractions.net


We will give some presentation about uDig and its Spatial Toolbox, both from a technical point of view as well as a user pooint of view.


We will also introduce the LESTO toolbox, which enables LiDAR data processing in the Spatial Toolbox.To get an idea about LESTO, have a look here.


That is all for now. But we'll keep you posted as soon as we have news.


Tuesday, August 19, 2014

STAGE - Desktop Tools (also) for Geopaparazzi

With the new upcoming geopaparazzi 4 release a few issues had to be solved:
  1. What should I do with all my old geopaparazzi 3 surveys? How do I integrate them with new data?
  2. What do I use to export data from a geopaparazzi 4 project to my GIS environment?
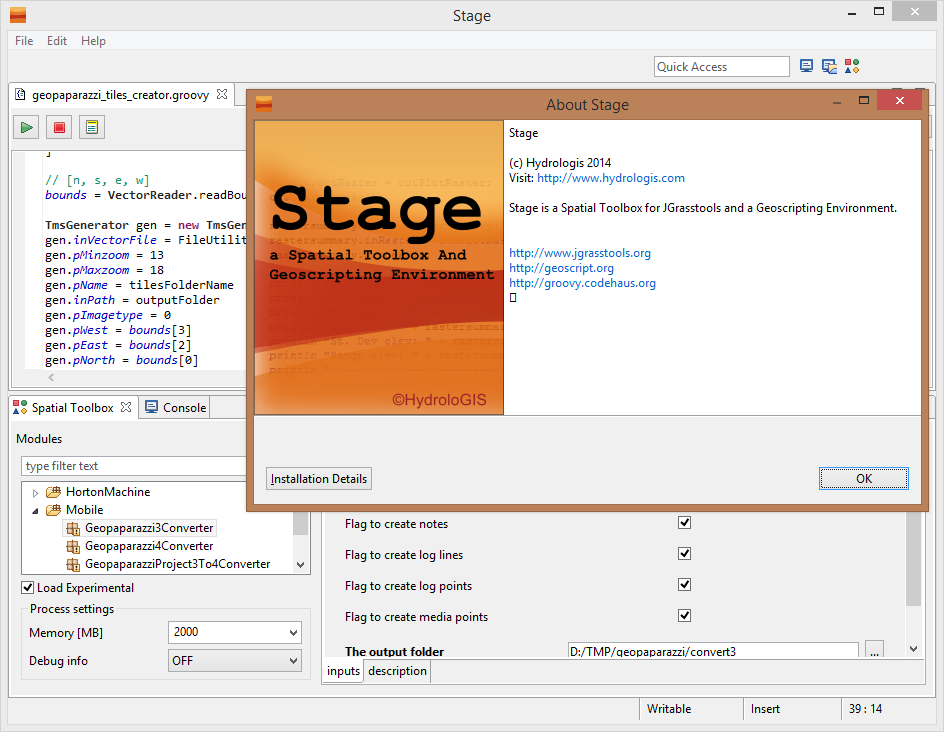
Well, we solved both the above problems inside STAGE, a Spatial Toolbox And Geoscripting Ennvironment, which is the tool we develop and use for the JGrasstools library for environmental modelling.

For those asking if it is the same Spatial Toolbox that comes with uDig, the answer is yes and no. Yes, because it is the same source code. And no, because since uDig is in the process of (and a bit stuck in) migrating through the Locationtech incubation, we needed to step forward with the geotools versions. So see STAGE as the temporary solution to work with the Spatial Toolbox, until we can enhance the uDig version again.


So where do I get STAGE and how do I use it for Geopaparazzi? A video tutorial showing it all can be found here:


Enjoy!


ADDENDUM: since it has been asked, this is the link to the current download area of STAGE: http://git.io/stage_releases


Saturday, March 23, 2013

Course: Geographic scripting in uDig - halfway between user and developer

I recently gave a course at the University of Potsdam about scripting in uDig. Since I didn't want me to take again more than a year to get this to you all (see here), I posted them already to slideshare.

This will soon be converted to a tutorial for the uDig community and available from its documentation section.

It will also be the big version of what I am going to present as a workshop to this years FOSS4G. Lets see if it gets picked.


Part 1: Introduction to uDig


Enjoy and share if you like them!


Monday, January 7, 2013

Proposal: Geoscript console in uDig

Recently I proposed to add an Editor to uDig, which would support Geoscript scripting from within uDig. The full proposal (RFC) is here.

Since there were some comments/questions in the community and I think some small missunderstandings, I would like to give a small overview of what is there already and how it should work. I will not repeat here what already mentioned in the RFC.

Currently this is in proposal state and will get into uDig only if the PSC will vote in favour. That said, we are working already on it for a while now, so there is some to show.

1) Open the editor

Two new icons appear, the will allow to open the editor creating a new empty script or to open an existing script.


We will create a new one. The user will be prompted to save the new script to file and an empty editor is opened.


There are a few tool inside the editor, needed to start and stop scripts, or set the heap memory allowed to be used by a script or enable logging.

2) Script away, with command completion and syntax coloring

Inside the editor some basic command completion is available. For geoscript objects, as for example the widely use Geometry:


but also for methods, as for example the fromWKT, a handy way to create geometries on the fly:


You might have noted that first the completion proposals that start with the inserted text are suggested and after those also the once that simply contain the text.

You might also have noted that keywords have a nice syntax coloring, in order to make the script more readable... and often to help users to make sure they have no typos :)


3) run your script

Once you have something you want to run, simply push the start button. The script will be run through the Spatial Toolbox engine and print the output in the console view. Let's create two polygons and intersect them.


4) plot some result - missing imports

Geoscript needs you to define the modules you want to use in your script through the import directive, which is usually placed at the top of the script.

If we try to plot the result by simply adding the plotting directive, it will fail, because the plot module was not imported:


The editor supplies a quick way to import the most common modules, which can be useful for people starting with the scripting and that do not know where the modules are. Push the button at the right of the stop button and the imports are added to the top. After that the script will work:


5) Geoscript

Geoscript allows for some fun, the best way to get into it is to start from the tutorials page. Just to add one more complex example, lets see a script that can render a map, properly styled, to an image:


Guys it is 2013, a GIS needs a scripting engine!!
We started with the JGrass scripting years ago and failed. Now that geoscript is here, this sounds like the way to run.