Thursday, August 26, 2010

SWT, Tabfolder and ScrolledComposite

Every time I have to create a scrolled tabfolder, it is the same. I have to fiddle around to make it work nicely. Around the net I can't find a good and complete example.

So here is how I solved it. Didn't have time to clean the code up. Remove objects you don't need and if you have troubles, just ping me. Hope this helps someone.
Here we go:


// create the tab folder
final CTabFolder folder = new CTabFolder(parent, SWT.BOTTOM);
folder.setUnselectedCloseVisible(false);
folder.setLayout(new FillLayout());

// for every Tab object create a tab
List orderedTabs = form.getOrderedTabs();
boolean first = true;
for( Tab orderedTab : orderedTabs ) {
// the tabitem
CTabItem tab = new CTabItem(folder, SWT.NONE);
tab.setText(orderedTab.text);
if (first) {
// select the first tab
folder.setSelection(tab);
first = false;
}

// we want the content to scroll
final ScrolledComposite scroller = new ScrolledComposite(folder, SWT.V_SCROLL);
scroller.setLayout(new FillLayout());

// the actual content of the tab
Composite tabComposite = new Composite(scroller, SWT.NONE);
tabComposite.setLayout(new MigLayout(orderedTab.layoutConstraints, orderedTab.colConstraints));

// which goes as content to the scrolled composite
scroller.setContent(tabComposite);
scroller.setExpandVertical(true);
scroller.setExpandHorizontal(true);
scroller.setMinHeight(folder.computeSize(SWT.DEFAULT, SWT.DEFAULT).y);
scroller.addControlListener(new ControlAdapter(){
public void controlResized( ControlEvent e ) {
// recalculate height in case the resize makes texts
// wrap or things happen that require it
Rectangle r = scroller.getClientArea();
scroller.setMinHeight(folder.computeSize(SWT.DEFAULT, r.height).y);
}
});

// the scroller gets the control of the tab item
tab.setControl(scroller);


// add things to the tab composite
List< ? extends FormElement> orderedElements = orderedTab.getOrderedElements();
for( FormElement orderedGuiElement : orderedElements ) {
FormGuiElement formGui = FormGuiFactory.createFormGui(orderedGuiElement);
formGui.makeGui(tabComposite);
}
}

Friday, August 20, 2010

Labels and Raster color masks

A quick update on the style editors for uDig for those who care.
The labels part and a raster color mask is now there for testing.

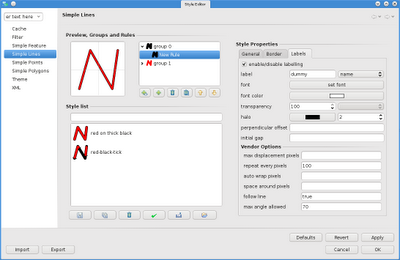
1) Example about lines labels

Now all the feature style panels have a labels panel added:


from there you can do several stuff, I will just show the labelling of lines here.

More or less I tried to support everything that gepotools does (some of it is taken from the sld cookbook of the geoserver community).

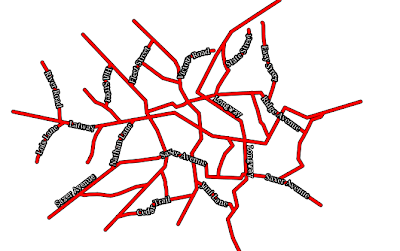
So the result would be:


2) Another thing that has been missing for a while in uDig is the possibility to create an alpha mask based on a color for imagery.

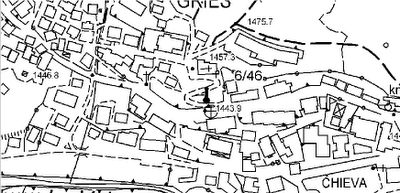
If for example I have a tecnical map:


which I would love to see in overlay with an ortophoto, I now can go into the style options and set a color to alpha:


Which then would lead to have the wanted overlay:


Sadly this last is not something that is supported in the SLD specs (so they tell me), so it can't be persisted in a sld file. However it might be added to geotools as a vendor option. That would be awesome. For now, I'll enjoy it in uDig...

Saturday, August 14, 2010

svn merges from trunk

How easy is it to merge fixes from trunk into a stable version you did before?

With mercurial or git really easy, with svn it might be really easy :)

I have been lucky, having to merge fixes from the uDig trunk into the uDig 1.2.0 release tag, which, as it seems, was not really ready and didn't pass the QA.

Few steps to do the merge:

1) checkout the tag into which the new changes have to go


svn co http://svn.refractions.net/udig/udig/tags/1.2.0 udig1.2.0tag


that creates a folder udig1.2.0tag with the tag code in it.

2) cd into that folder and check for the differences with trunk:


svn diff http://svn.refractions.net/udig/udig/trunk -r31936:31952


31936:31952 are the revisions that were added to trunk after the tag.

Check the changes and see if the patch can work out for you or.... if you nothing scares you....

3) do the merge! :)


svn merge -r31936:31952 http://svn.refractions.net/udig/udig/trunk


Well, if you are lucky you have no conflicts, else just open up your IDE and fix them. Then commit. Your merge is done. Hmmmm, why is this always so scary?

Friday, August 13, 2010

Lines Styles and staring over again

Well, it sometimes happens that you are almost there and you should just add those 2% and you find that little something that you think you will need or you should put in there. And even if your schedule tells you to leave it out, you can't sleep at night, awake staring at the white roof of your room.

Well, this is what happened to me, since I wanted to make the uDig style editor from the merging of SLD into the QGIS gui design. So I decided, as you probably saw in my latest posts, that there had to be something called rules which would represent a style property for a certain geometry.

In SLD there are things called FeatureTypeStyle and Rule. And later I will show you also what they can infuence.

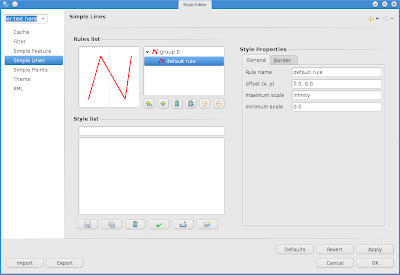
For now let's start with a simple road-map.


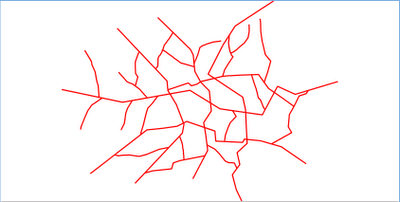
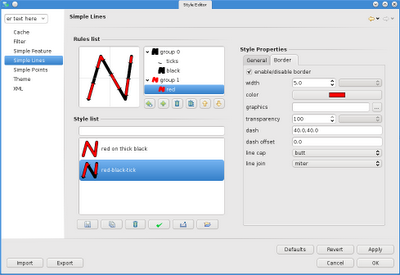
Which in the editor looks like:


You might note that the rules list if now a tree viewer. Whan looking at the tree viewer think of the following mapping:

root elements = groups = FeatureTypeStyle
children elements = rule = Rule

For some that might sound strange, but I know some will understand :)

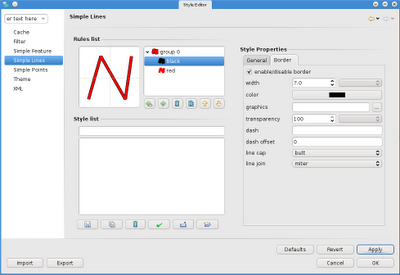
Alright, let's add a second rule that has a line a bit thicker then the first, in order to give the feeling of a line with black border.


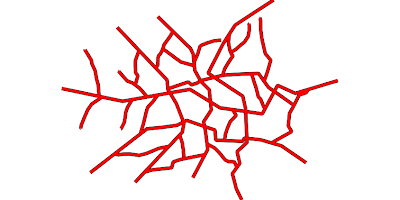
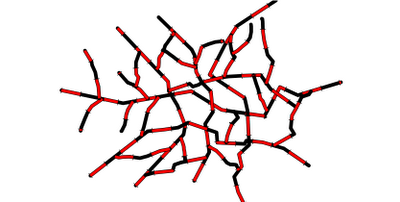
We now have a group with two rules, which will result in:


And exactly here lies the problem. Do you see the ugly overlapping of the roads?

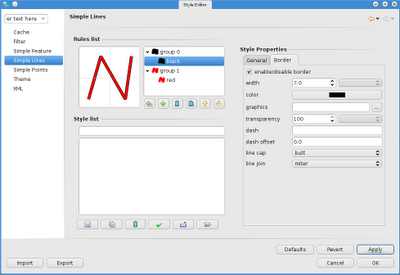
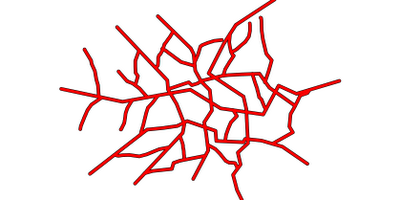
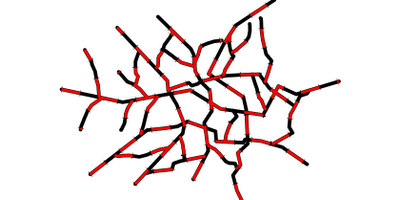
If we instead do the same with two groups and one rule per group:


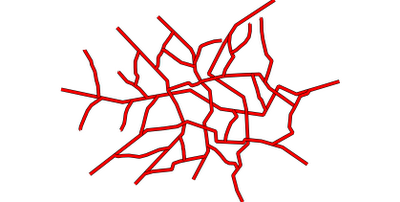
we gain the wanted result:


if we then also take care a bit of the caps and joins of the lines it looks even better:


To end the thing with some more fun, let's play with the dashing of the lines.

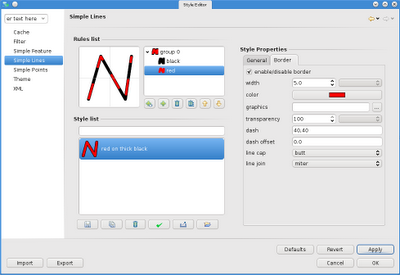
We first set the dash of the red line to 40.0, 40.0:


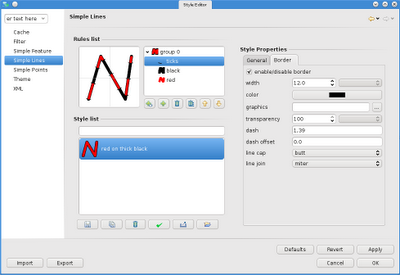
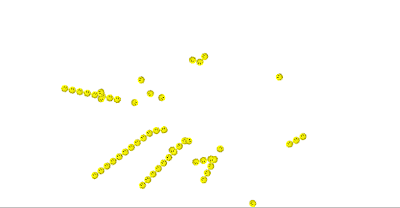
and let's also add some ticks to make it nicer:


And here we go:


Well, we have again the overlapping problem... so we try to split in more groups:


which is better, but we still have problems on the line ends:


Well, at the end I also did a try with graphics stroke, but that one is not yet well supported in the geotools 2.6 series, which is on what uDig 1.2 bases on:


They say geotools 2.7 has better support for graphics strokes, so that will be available in uDig 1.3.

Saturday, August 7, 2010

Themed Styles are back in time for 1.2 release

Those that were using the release candidates of uDig and were interested in style might have noticed that the themed style editor got quite buggy.

In the final rushes of the 1.2.0 release of uDig we fixed all of it (that we noticed) and also added a couple of enhancements.

First of all, icons were all black and didn't show the geometry type.
Now we see polygons being like this:


and points like this:


we also note differences between the point mark type:


One thing I was really finding blocking was the fact that only ColorBrewer colortables were supported. Well, I heard many people tell me that 12 classes of color would be enough, but then again I was asking myself why for example the standard colortable of the Corine Landcover has 45?

Well, everyone should be able to choose, so I did two things:

1) Add two dynamic colortables that adapt to the number of requested classes by colorinterpolation:


You might or might not know that the colorrules can be customized and the border color can be set.


Well, that makes Italy look a bit like the Girl in the red coat from Schnidler's List. Well, given the current political status...


2) It is now possible to add custom colortables to uDig. In my example I added the Corinne Landcover colortable:


Well, I have to add something that will come through the new style editor that is in progress :)

So let's for example start with the cities layer and create a theme with the population rank as unique value (which also was added right now).


Then let's jump into the new points panel, were we find the different rules of the theme as expected. In the General Properties of each rule we then set the size to be field based:


The result is a theme that also sets the size:

Friday, August 6, 2010

Fun playing with the new style editor

Well, I am currently trying to fix glitches on the themed editor of udig. While doing this I got into a combined playing with the themed editor page and the new point editor page I am developing :)

Here is what might happen:

1) Create a simple point style


2) Switch to the theme editor and make it a range style


3) How does it look in the new point editor? Well, as assumed, it separates the rules and makes them available separately


4) So let's do something with the rules :)


5) Which wil result into this


6) Which then you might decide to put into your symbol library?


And I thought at first SLD would not be fun :)

Thursday, August 5, 2010

PreferenceConverter

I was wondering how to save colors or non int/double/boolean/string values into rcp preferences. As usual it is very easy if you know the tool to use. :)

So from Color -> Preference

IPreferenceStore store = ...
Color red = Display.getDefault().getSystemColor(SWT.COLOR_RED);
PreferenceConverter.setDefault(store, "COLOR_KEY", red.getRGB());


And back: Preference -> Color

RGB colorRgb = PreferenceConverter.getColor(store, "COLOR_KEY");
Color red = new Color( Display.getDefault(), colorRgb);


Same applies for example for Fonts or Rectangle and other nice things.